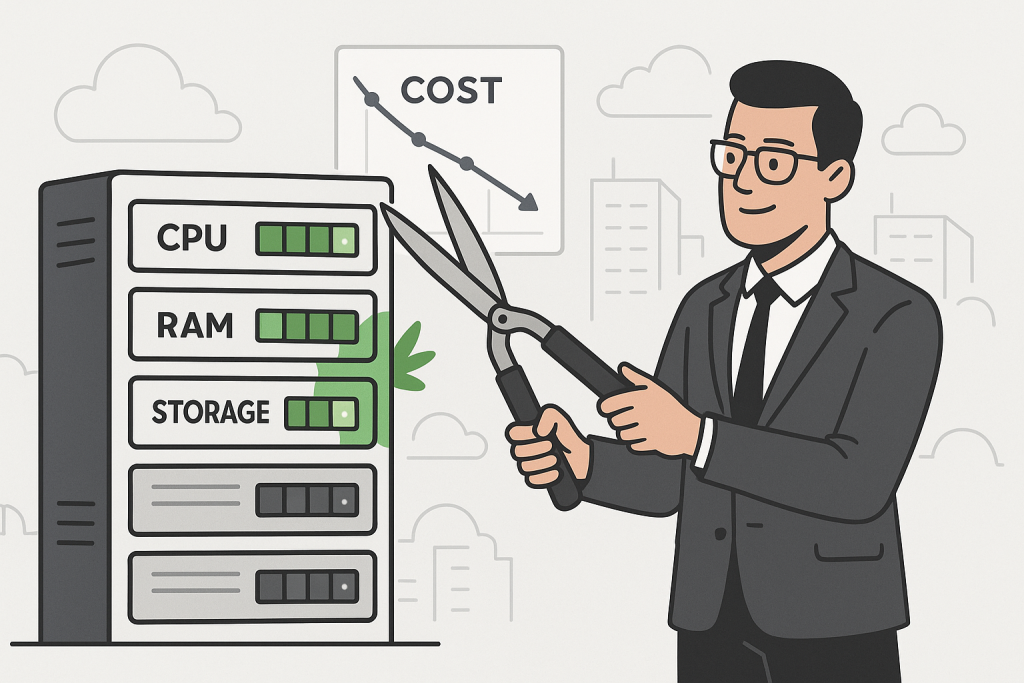
In the dynamic world of web hosting, efficiency is not just a buzzword; it’s a critical component of sustainable growth. For businesses and developers relying on Virtual Private Server (VPS) hosting, the allure of dedicated resources and greater control often comes with the challenge of managing costs effectively. It’s a common scenario: you scaled up your VPS during a peak period, or perhaps provisioned more resources than you actually needed “just in case.” Now, those unused resources are silently bleeding your budget dry.
The good news? Cost optimization on VPS hosting doesn’t have to be a daunting task involving risky server reconfigurations or disruptive downtime. With the right strategies and a methodical approach, you can significantly trim unused resources, enhance performance, and achieve substantial savings—all without impacting your live services. This comprehensive guide will walk you through the why, what, and how of VPS cost optimization, ensuring your infrastructure is lean, efficient, and cost-effective.
The Silent Budget Drain: Why Unused Resources Matter
Before diving into the “how,” let’s understand the “why.” Why should you care about unused CPU cores, excess RAM, or underutilized storage?
- Direct Financial Cost: This is the most obvious factor. You pay for what you provision, not just what you use. Every GB of RAM, every CPU core, and every GB of storage that sits idle is a line item on your monthly bill that offers no return on investment. Over time, these seemingly small amounts can add up to significant figures.
- Environmental Impact: While perhaps not your primary concern, energy consumption is a factor. More provisioned resources, even if idle, contribute to the overall energy footprint of the data center. Optimizing can be a small step towards greener IT.
- Performance Misconceptions: Sometimes, administrators provision excessive resources thinking it will automatically lead to better performance. In reality, poorly configured applications or inefficient code won’t magically perform better with more idle resources. Instead, focusing on optimizing resource usage is key.
- Security Overhead (Minor): While not a primary concern, a larger, more complex server environment could theoretically present more surface area for potential misconfigurations, though this is less about unused resources directly and more about general server bloat.
The goal, then, is not just to cut costs, but to achieve a state of optimal resource allocation where your applications have exactly what they need to perform excellently, with minimal waste.
Understanding Your VPS Resources: The Foundation of Optimization
To trim effectively, you must first understand what you have and how it’s being used. A VPS typically comes with several key resources:
- CPU (Central Processing Unit): Measured in cores and clock speed. This dictates processing power.
- RAM (Random Access Memory): Measured in GBs. This is crucial for application speed, caching, and concurrent user handling.
- Storage (Disk Space): Measured in GBs. This is where your OS, applications, databases, and files reside. Often, you’ll choose between HDD, SSD, or NVMe storage, each with different performance characteristics and costs.
- Bandwidth/Data Transfer: Measured in GBs or TBs per month. This is the amount of data your server can send and receive.
- Network I/O: The speed at which your server can read/write data over the network, often tied to your server’s uplink speed.
Before making any changes, you need a clear picture of the historical usage patterns of these resources.
Step 1: Comprehensive Resource Monitoring and Analysis
This is the most critical preparatory step. You can’t optimize what you don’t measure.
Tools for Monitoring:
- Built-in VPS Provider Dashboards: Most VPS providers (AWS, Google Cloud, DigitalOcean, Linode, Vultr, etc.) offer dashboards with graphs showing CPU, RAM, disk I/O, and network usage over time. This is often the easiest starting point.
- Operating System Tools:
- Linux:
top,htop,free -h,df -h,iotop,netstat. For historical data,sar(System Activity Report) is incredibly powerful. - Windows: Task Manager (Performance tab), Resource Monitor.
- Linux:
- Third-Party Monitoring Solutions: New Relic, Datadog, Grafana with Prometheus, Zabbix, Nagios. These offer more granular data, alerts, and long-term trend analysis.
- Web Server/Database Logs: Apache/Nginx access logs, MySQL/PostgreSQL slow query logs can highlight application-level bottlenecks, which might wrongly be attributed to resource shortages.
What to Monitor and For How Long:
- CPU Usage: Look for sustained high usage, but also for periods of low usage. What’s the average? What are the peaks? Are the peaks tied to specific events (e.g., cron jobs, traffic spikes)?
- RAM Usage: How much RAM is typically used by your applications? How much is cached? How much is truly free? Pay attention to swap usage—if your server is consistently swapping, you might be short on RAM, or have a memory leak.
- Disk I/O: How often is your disk being read from and written to? High I/O can indicate slow storage or I/O-intensive applications.
- Network I/O/Bandwidth: Track incoming and outgoing data. Are you consistently hitting your bandwidth limits or using only a fraction?
- Application-Specific Metrics: If you run a web server, monitor active connections; for databases, monitor query execution times.
Crucially, monitor over a sufficient period. A single day won’t give you an accurate picture. Aim for at least 1-2 weeks, preferably covering different times of day, days of the week, and any predictable peak load periods (e.g., end-of-month reports, weekly newsletters). This helps distinguish between regular usage and transient spikes.
Analyzing the Data:
- Identify Baselines: What’s the typical “idle” usage?
- Pinpoint Peaks: When do resource usages spike? What causes them? Are these spikes sustainable with your current resources?
- Look for Plateaus: Are resources consistently at a certain level, indicating potential over-provisioning or a stable demand?
- Uncover Anomalies: Any unexpected drops or surges? These could point to issues or inefficiencies.
The goal here is to answer: “What’s the minimum amount of resources my server needs to operate comfortably during its typical peak usage?” and “How much of my provisioned resources are consistently sitting idle?”
Step 2: Optimizing Applications and Server Configuration (Software-Level)
Before touching the VPS resources themselves, optimizing your software stack is often the most impactful step and can reveal that you need fewer resources than you initially thought. This is about making your existing resources work harder and smarter.
Web Server Optimization (Apache/Nginx):
- Caching: Implement browser caching, server-side caching (e.g., Varnish, Redis), and application-level caching. This reduces the number of requests that hit your backend and speeds up delivery.
- Compression: Enable Gzip or Brotli compression for text-based assets (HTML, CSS, JS).
- KeepAlive: For HTTP/1.x, adjust
KeepAliveTimeoutto keep connections open longer for subsequent requests, reducing connection overhead. - Worker/Process Management:
- Apache (MPM Event/Prefork/Worker): Tune
StartServers,MinSpareServers,MaxSpareServers,MaxRequestWorkers. Too many can waste RAM, too few can cause queuing. Event MPM is generally more efficient for modern setups. - Nginx: Nginx is often more efficient out of the box. Tune
worker_processes(often set toautoor number of CPU cores) andworker_connections.
- Apache (MPM Event/Prefork/Worker): Tune
- Load Balancers: If you’re running multiple applications or have high traffic, consider offloading SSL termination and load balancing to a dedicated instance or service.
Database Optimization (MySQL/PostgreSQL/MongoDB):
- Query Optimization: Identify and optimize slow queries using
EXPLAIN(SQL databases) ordb.currentOp()(MongoDB). Add appropriate indexes. - Caching: Configure database caching (e.g.,
query_cache_size,innodb_buffer_pool_sizefor MySQL). Ensure adequate RAM is allocated for the buffer pool. - Connection Pooling: Use connection pooling in your application to reduce the overhead of establishing new database connections for every request.
- Table/Collection Optimization: Regularly optimize and clean up tables (e.g.,
OPTIMIZE TABLEin MySQL).
Application-Level Optimization (PHP, Python, Node.js, etc.):
- Code Review: Identify inefficient loops, redundant database calls, and memory leaks.
- Caching Frameworks: Utilize caching mechanisms provided by your application framework (e.g., WordPress object cache, Laravel cache, Django cache).
- Session Management: Store sessions efficiently, perhaps using Redis or Memcached instead of file-based sessions for better performance.
- Background Jobs: Offload non-critical, long-running tasks to background job queues (e.g., Redis Queue, RabbitMQ, Celery) to free up web server processes.
- Image Optimization: Compress and lazy-load images. Use modern formats like WebP.
Operating System & General Server Cleanup:
- Remove Unused Software: Uninstall packages, services, and applications you no longer need. Each daemon consumes some RAM and CPU.
- Disable Unnecessary Services: Stop and disable services that aren’t critical for your operations (e.g., certain printing services, development tools).
- Log Management: Rotate and compress logs regularly to prevent disk space exhaustion. Consider externalizing logs to a dedicated logging service.
- Cron Jobs: Review all scheduled tasks. Are they still needed? Can their frequency be reduced? Can they be scheduled during off-peak hours?
- Firewall Rules: Ensure your firewall (e.g., UFW,
firewalld, iptables) is configured correctly to block unnecessary incoming traffic, which can consume minor resources.
After implementing these software-level optimizations, re-monitor your resource usage for another week or two. You might find that your baseline usage has dropped significantly, making the next step much clearer.
Step 3: Strategic Resource Downsizing (Hardware-Level, Without Downtime)
Now that your software is optimized and you have clear usage data, you can look at adjusting your VPS plan. The key here is to do it without downtime.
The Myth of “No Downtime” for Resource Reduction:
It’s important to be realistic. Most VPS providers will require a reboot to change core CPU, RAM, or main storage allocations. This is because these are fundamental “hardware” level changes to the virtual machine itself.
However, “without downtime” in this context often refers to minimizing unplanned downtime and strategic planning of brief, scheduled downtime. The goal is to make any necessary reboots as short and infrequent as possible.
How to Approach Resource Downsizing Safely:
- Backup, Backup, Backup! This is non-negotiable. Before making any changes to your VPS plan, perform a full backup of your entire server. Most providers offer snapshot features, which are excellent for this. Download critical data to a separate location.
- Schedule Maintenance Window: Choose an off-peak time when traffic is minimal. Communicate any potential downtime to your users if applicable. Even if it’s just a 5-minute reboot, it’s good practice.
- Initiate Downsizing via Provider Panel:
- Log in to your VPS provider’s control panel.
- Navigate to your server’s settings or “resize” / “change plan” options.
- Select a smaller plan that aligns with your newly established resource requirements based on your monitoring data.
- Confirm the change. Most providers will automatically shut down your VPS, reconfigure it, and start it back up. This process usually takes only a few minutes.
- Verify Service After Reboot:
- Once the VPS reboots, immediately check all your critical services.
- Access your website, test applications, and ensure databases are running.
- Check your monitoring tools again to confirm the new resource allocations are reflected and that the server is operating within its new limits without struggling.
Specific Resource Considerations for Downsizing:
- CPU Cores: If your CPU utilization rarely exceeds 20-30% on average, and peaks are manageable, you likely have too many cores. Reduce the number of cores.
- RAM: This is often the most expensive resource. If
free -hconsistently shows many GBs of truly free (not cached) RAM, or if your swap usage is minimal to non-existent, you can likely reduce RAM. Be cautious with RAM reduction. Undercutting RAM can lead to heavy swapping, which cripples performance. Aim for a buffer, but not excessive waste. - Storage:
- Reducing Disk Size: This is typically much harder, if not impossible, to do without a full server rebuild and data migration. Most VPS providers do not allow “shrinking” a disk partition in place easily. If you have significantly over-provisioned disk space and want to reduce it, the most common approach is to create a new, smaller VPS, install the OS, and then migrate your data and applications to it. This involves more downtime and effort.
- Optimizing Disk Usage: Focus on cleaning up large, unnecessary files, old backups, log files, and removing unused applications instead. If you’re on expensive SSD/NVMe storage, consider moving static files or backups to cheaper object storage (like AWS S3, DigitalOcean Spaces, etc.) if your application architecture allows.
- Bandwidth: If your monitoring shows you’re using a fraction of your allocated bandwidth, downgrade to a plan with less bandwidth. Be mindful of bursting capabilities; some providers allow occasional spikes beyond your committed amount.
What if Downtime is Absolutely Unacceptable?
If a reboot is genuinely not an option (e.g., 24/7 mission-critical systems with zero tolerance for outages), your options for reducing core CPU/RAM are extremely limited, bordering on impossible for standard VPS configurations. In such scenarios, you would typically:
- Live Migration (Advanced/Provider-Specific): Some highly advanced cloud platforms (like VMware vSphere, KVM in specific configurations) can support live migration of VMs between physical hosts with different resource configurations, but this is usually a feature of enterprise-grade solutions, not standard VPS offerings.
- Leverage Application-Level Elasticity: Design your application to scale horizontally across multiple smaller, cheaper instances rather than vertically on one large instance. This often involves using containerization (Docker, Kubernetes) and managed services (PaaS).
- Cost-Aware Cloud Instances: Utilize cloud providers’ flexible instance types, reserved instances, or spot instances (for fault-tolerant workloads) to get better pricing for specific resource profiles.
For most conventional VPS users, a brief, planned reboot is the accepted and most practical method for hardware resource adjustments.
Step 4: Continuous Monitoring and Iteration
Cost optimization is not a one-time event; it’s an ongoing process.
- Set Up Alerts: Configure alerts in your monitoring system for high CPU, RAM, or disk usage. This will warn you if your trimmed resources are insufficient and your server is struggling.
- Regular Review: Periodically (e.g., quarterly or semi-annually) review your resource usage data. As your applications evolve, traffic changes, or new features are added, your resource needs will also change.
- Stay Informed: Keep an eye on new hosting plans and features from your provider. Sometimes, newer plans offer better performance-to-cost ratios.
- Consider Auto-Scaling (if applicable): While not standard for a single VPS, if you migrate to a more flexible cloud environment, implementing auto-scaling based on demand can ensure you only pay for what you use, dynamically adding or removing resources.
Potential Pitfalls and How to Avoid Them
- Over-Trimming: The biggest risk is cutting too many resources, leading to performance degradation, slow loading times, errors, or even service outages. Always err on the side of caution during the initial reduction and have your monitoring in place.
- Ignoring Peaks: Basing your resource decisions solely on average usage can be misleading. Always provision for your peak usage, with a comfortable buffer.
- Not Testing Thoroughly: After any change, test your applications extensively. Simulate user load if possible.
- Neglecting Backups: Never, ever skip a full backup before making significant infrastructure changes.
- Failing to Understand Application Needs: A resource crunch might be due to inefficient code or poor configuration, not an inherent lack of server resources. Optimize the software first.
- Provider-Specific Limitations: Be aware that not all VPS providers offer the same flexibility for resource adjustments. Some might make downsizing difficult or require specific steps. Always consult your provider’s documentation.
Real-World Scenario: A Small E-commerce Site
Let’s imagine a small e-commerce site running on a VPS. Initially, the owner bought a plan with:
- 4 CPU Cores
- 8GB RAM
- 160GB SSD
After 3 months of operation, they notice their monthly bill is higher than expected. They follow the optimization steps:
- Monitoring: They enable detailed monitoring. They discover:
- CPU: Averages 10%, peaks at 30-40% during sales.
- RAM: Regularly sits at 4GB used, with 2GB cached and 2GB truly free. Swap usage is zero.
- Disk: Only 40GB used in total, mostly by WordPress, MySQL, and product images.
- Bandwidth: Using about 200GB out of 1TB allocated.
- Software Optimization:
- They implement a robust caching plugin for WordPress.
- They optimize some slow database queries identified via MySQL’s slow query log.
- They compress all product images.
- They disable a few unused WordPress plugins.
- Re-monitoring: After optimizations, they observe:
- CPU: Averages 8%, peaks at 25-35%.
- RAM: Now averages 3GB used, with 1GB cached and 4GB truly free. Still no swap.
- Strategic Downsizing:
- Based on the data, they decide they can comfortably downgrade.
- They choose a new plan: 2 CPU Cores, 4GB RAM, 80GB SSD.
- They perform a full snapshot backup.
- They schedule a 2 AM maintenance window.
- They initiate the plan change via their provider’s panel. The VPS reboots in 3 minutes.
- Verification: Post-reboot, they verify the website, test product pages, and check monitoring. Everything runs smoothly.
Result: Their monthly hosting cost drops significantly, with no perceived impact on performance, and minimal downtime during a planned window. They then set up alerts for high resource usage to catch any future needs for scaling up.
Conclusion: A Leaner, More Efficient VPS Awaits
Cost optimization on VPS hosting is more than just saving money; it’s about achieving efficiency, understanding your infrastructure, and ensuring your resources are aligned with your actual needs. By methodically monitoring, optimizing your software stack, and strategically adjusting your VPS resources during planned maintenance windows, you can significantly reduce expenses without compromising performance or causing disruptive downtime.
Remember, the journey to an optimized VPS is continuous. Regular monitoring, proactive maintenance, and an agile approach will ensure your hosting environment remains lean, cost-effective, and ready to support your evolving business needs. Start by understanding your usage, make your software sing, and then trim the fat—your budget will thank you.


