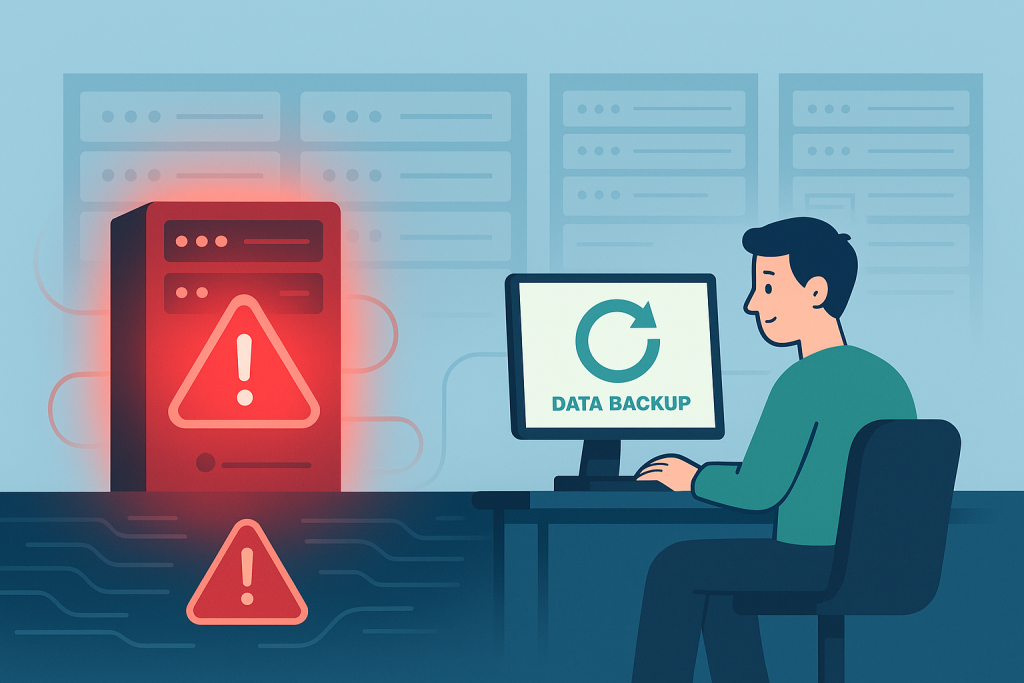
Imagine this: You wake up, grab your coffee, and decide to check your website. But instead of your beautifully designed homepage, you’re greeted by a blank white screen, a cryptic error message, or worse, a message from a hacker. Panic sets in. Your heart races. All those hours, all that effort, all your content – gone?
This nightmare scenario is precisely why disaster recovery in web hosting isn’t just a technical term; it’s your site’s life raft. It’s the plan, the tools, and the knowledge that can transform a catastrophic event into a manageable setback. Whether it’s a server crash, a malicious hack, a coding error, or even a natural disaster, knowing how to recover your website is absolutely non-negotiable for anyone serious about their online presence.
In this deep dive, we’re not just going to skim the surface. We’re going to explore what disaster recovery truly means for your website, why it’s more important than you might think, and most importantly, give you a detailed, step-by-step roadmap to get your site back online after the worst has happened. We’ll also cover crucial preventative measures to harden your site against future threats.
The Inevitable Truth: Disasters Happen
It’s easy to think, “That won’t happen to me.” But the reality is, the digital world is fraught with potential pitfalls. Servers fail. Software bugs emerge. Hackers are always looking for vulnerabilities. Human error is a constant factor. And yes, sometimes, even Mother Nature can play a part.
A site crash or a hack isn’t just an inconvenience; it can have severe consequences:
- Loss of Revenue: For e-commerce sites, every minute your site is down means lost sales.
- Reputational Damage: Visitors encountering a broken or compromised site will lose trust, potentially going to competitors.
- SEO Penalties: Search engines dislike downtime and insecure sites, which can significantly hurt your rankings.
- Loss of Data: Irreplaceable customer data, content, or transaction history could be permanently lost.
- Legal Implications: For businesses handling sensitive customer data, a breach can lead to hefty fines and legal battles.
Understanding these risks underscores the importance of having a robust disaster recovery plan before you ever need it.
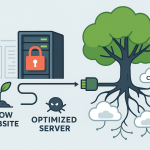
What Exactly is Disaster Recovery in Web Hosting?
At its core, disaster recovery (DR) is a comprehensive plan to ensure your website and its data can be restored and resume normal operations quickly and efficiently after a disruptive event. It’s about minimizing downtime and data loss.
Think of it as an insurance policy for your digital asset. It encompasses several key areas:
- Backup Strategy: The most crucial element. This involves regularly copying your website’s files and database to a secure, off-site location.
- Recovery Procedures: Documented steps on how to use those backups to restore your site.
- Monitoring and Alerting: Systems in place to detect issues early and notify you.
- Security Measures: Protections to prevent disasters in the first place (firewalls, malware scans, strong passwords).
- Testing: Regularly verifying that your backups work and your recovery plan is effective.
Without these components, you’re essentially operating without a safety net.
The Two Pillars of Disaster Recovery: Backups and Restoration
Everything in disaster recovery hinges on two critical processes: creating reliable backups and knowing how to effectively restore from them.
Pillar 1: Crafting an Impeccable Backup Strategy
Your backups are your lifeline. But not all backups are created equal. A truly effective strategy considers:
A. What to Back Up: Everything!
- Website Files: This includes your themes, plugins, images, videos, HTML, CSS, JavaScript – essentially everything in your public_html or web root directory.
- Database: For dynamic sites (like WordPress, Joomla, Drupal), your database holds all your content (posts, pages, comments, user info, product data). This is absolutely critical.
- Configuration Files: Files like
.htaccess,php.ini, or specific server configs might be important, though often restored by your host. - Email Accounts (if hosted on your server): If your email is tied to your hosting account, back up your mailboxes and settings.
B. Where to Back Up: Off-Site, Always!
Storing backups on the same server as your live site is like keeping your spare house keys inside your house – useless if the house is compromised. You need off-site storage:
- Cloud Storage: Google Drive, Dropbox, Amazon S3, OneDrive.
- Remote Servers: SFTP/FTP to another hosting account or a dedicated backup server.
- External Hard Drives: For local copies, but be mindful of security and physical damage.
- Specialized Backup Services: Many hosts or third-party tools offer integrated backup solutions.
C. How Often to Back Up: Depends on Activity!
- High-Activity Sites (e-commerce, busy blogs): Daily backups are essential. You can’t afford to lose a day’s worth of transactions or comments.
- Medium-Activity Sites (regular blog updates, portfolio changes): Weekly backups are usually sufficient, with more frequent database backups if content changes daily.
- Low-Activity Sites (static brochure sites): Monthly backups might be acceptable, but consider weekly for peace of mind.
D. How Many Backups to Keep: The “3-2-1 Rule”
This is a golden rule for data backup:
- 3 copies of your data: The original, and two backups.
- 2 different media types: E.g., on your server, and on a cloud service.
- 1 copy off-site: Crucial for true disaster recovery.
Many experts also recommend keeping multiple recovery points (e.g., the last 7 daily backups, the last 4 weekly, the last 3 monthly) to protect against corruption that might not be immediately apparent.
E. How to Perform Backups: Your Options
- Web Host Backups: Many shared hosting providers offer automated daily or weekly backups.
- Pros: Convenient, often included.
- Cons: Granularity can be limited, recovery options might be basic, and crucially, they are on the same server (or at least within the same provider’s infrastructure). Don’t rely solely on these.
- cPanel/Plesk Backups: If your host uses cPanel or Plesk, you’ll find backup tools that allow you to download full site backups (files + database) or individual components.
- Pros: User-friendly, good for manual backups.
- Cons: Can be slow for large sites, requires manual download.
- WordPress/CMS Plugins: For WordPress, plugins like UpdraftPlus, Duplicator, or BackWPup can automate backups to cloud storage.
- Pros: Automated, integrates well with your CMS, often offers incremental backups.
- Cons: Can consume server resources, potential for plugin conflicts.
- Manual Database Backups (phpMyAdmin): You can export your MySQL database directly through phpMyAdmin.
- Pros: Direct access, good for urgent database-only backups.
- Cons: Only covers the database, requires manual execution.
- Manual File Backups (FTP/SFTP): Download your entire
public_htmldirectory using an FTP client like FileZilla.- Pros: Complete control.
- Cons: Very slow for large sites, requires manual execution.
- Server-Side Scripting/CLI (Advanced): Using cron jobs with
mysqldumpfor databases andrsyncortarfor files can automate robust backups on VPS/dedicated servers.- Pros: Highly customizable, efficient.
- Cons: Requires technical expertise.
Pillar 2: Mastering the Art of Site Restoration
Having backups is only half the battle. Knowing how to use them to restore your site quickly and correctly is the other, equally vital half. This process will vary depending on your hosting environment and how you created your backups.
Step-by-Step Guide: Restoring Your Site After a Crash or Hack
Let’s walk through the general steps for restoring your site. This will assume you have a good backup available.
Scenario 1: Total Site Crash / Server Issues
This could be a host-side issue, a major software conflict, or a corrupted file system.
Step 1: Contact Your Web Host (Immediately!) Your host has the most direct access to the server. They might already be aware of the issue and working on it. They may also have their own backups they can restore for you, which is often the quickest solution. Provide them with as much detail as possible: when the problem started, any error messages, and what you were doing right before the crash.
Step 2: Access Your Hosting Control Panel (cPanel/Plesk) If your host can’t immediately restore, you’ll need to do it yourself. Log into your control panel.
Step 3: Database Restoration
- Identify the Corrupted Database: You’ll typically find this in your site’s configuration file (e.g.,
wp-config.phpfor WordPress). - Go to phpMyAdmin: In cPanel, find “phpMyAdmin.”
- Select Your Database: Click on the database name from the left sidebar.
- Drop All Tables (Carefully!): Before importing, it’s often safest to “Check All” tables and then use the “With selected:” dropdown to “Drop” them. This clears out any corrupted data.
- Import Your Backup: Go to the “Import” tab, click “Choose File,” select your
.sqlbackup file (or.sql.zip,.sql.gz), and click “Go.” This will import all your database content.
Step 4: File Restoration (FTP/File Manager)
- Connect via FTP/SFTP: Use an FTP client (FileZilla) or your host’s File Manager in cPanel.
- Navigate to Your Web Root: This is usually
public_html. - Delete Existing Files (Caution!): If your site is completely corrupted, you might need to delete all existing files and folders in your web root. Only do this if you are sure you have a complete, working backup. If you’re only replacing specific files, proceed to the next step without deleting everything.
- Upload Your Backup Files: Upload the entire contents of your website file backup (your themes, plugins, uploads, etc.) to the
public_htmldirectory. This can take a while for large sites.
Step 5: Verify and Test Once both the database and files are restored, clear your browser cache and visit your site. Check all pages, forms, and functionalities. Make sure everything looks and works as expected.
Scenario 2: Website Hack or Malware Infection
This is often more complex because you’re not just restoring; you’re also cleaning.
Step 1: Isolate the Website If you suspect a hack, the very first thing to do is prevent further damage. This might involve:
- Changing all Passwords: Especially your cPanel, WordPress admin, database user, and FTP passwords.
- Contacting Your Host: Inform them of the breach. They may be able to suspend the site temporarily to stop the spread and offer tools for analysis.
- Temporarily Disabling the Site: You can do this by renaming your
index.php(orindex.html) file or placing a simple “Under Maintenance” HTML file in its place.
Step 2: Identify the Source and Scope of the Hack
- Run a Malware Scan: Many hosts offer site scanners (like SiteLock) or you can use tools like Wordfence (for WordPress) or Sucuri.
- Check Server Logs: Look for suspicious activity (unusual IP addresses, sudden spikes in traffic, unauthorized file access).
- Review Recent File Changes: Hackers often modify existing files or add new ones. Check for recently modified files on your server that you didn’t change.
Step 3: Clean the Website (Before Restoration) This is critical. Restoring an infected backup simply brings back the problem.
- Use a Clean Backup: The ideal scenario is to have a backup from before the infection occurred.
- Scan and Clean Files: If you don’t have a perfectly clean backup, you’ll need to use security plugins or professional cleaning services to identify and remove malicious code from your files. This is often an iterative process.
- Check User Accounts: Delete any suspicious user accounts that weren’t created by you.
- Inspect
htaccessandindexfiles: Hackers often inject redirects or malicious code into these files.
Step 4: Restore from a Clean Backup Once you are confident the infection has been removed or you have a known clean backup:
- Perform Database Restoration: (See Step 3 above for a crash)
- Perform File Restoration: (See Step 4 above for a crash)
Step 5: Harden Your Site and Monitor
- Update Everything: Ensure your CMS, themes, plugins, and PHP versions are all up-to-date.
- Implement a Web Application Firewall (WAF): Services like Cloudflare or Sucuri WAF can filter malicious traffic.
- Strengthen Security Measures:
- Use strong, unique passwords for everything.
- Enable Two-Factor Authentication (2FA) wherever possible.
- Limit file permissions (e.g.,
chmod 644for files,chmod 755for directories). - Remove unused themes and plugins.
- Regularly scan your site for malware.
- Monitor Logs: Keep an eye on your server access logs and security logs for unusual activity.
- Change Salts (WordPress): For WordPress, regenerating your security keys and salts in
wp-config.phpwill log out all users and invalidate existing cookies.
General Tips for a Smoother Restoration
- Stay Calm: Panic leads to mistakes. Take a deep breath.
- Document Everything: Keep a log of what happened, what steps you took, and any error messages. This helps with future prevention and debugging.
- Have Login Details Ready: Keep all your hosting, cPanel, FTP, database, and CMS admin logins in a secure, accessible place.
- Check File Permissions: Incorrect file permissions are a common post-restoration issue. Ensure files are generally
644and directories755. - Clear Caches: After restoration, clear any server-side, plugin-based, or CDN caches. Your browser cache too!
Beyond Restoration: Preventing Future Disasters
The best disaster recovery plan is one you rarely have to use. Proactive prevention is key.
- Regular, Verified Backups (Most Important!): We’ve covered this, but it bears repeating. Automate them, store them off-site, and regularly test them by performing a test restoration on a staging environment. If your backup doesn’t work, it’s not a backup.
- Keep All Software Updated: This includes your CMS (WordPress, Joomla, etc.), themes, and plugins. Updates often include critical security patches.
- Strong Passwords & 2FA: Use complex, unique passwords for every account. Enable two-factor authentication (2FA) wherever offered (hosting, cPanel, WordPress admin).
- Use Reputable Hosting: Choose a host known for its reliability, security, and responsive support. Good hosts often have their own robust server-level backup and disaster recovery mechanisms.
- Implement Security Measures:
- Firewall: A web application firewall (WAF) can block many attacks before they reach your site.
- Malware Scanners: Regularly scan your site for malicious code.
- SSL Certificate (HTTPS): Encrypts data between the user and your site, building trust and providing a minor SEO boost.
- Limit Login Attempts: Prevent brute-force attacks.
- Change Default Admin Usernames: Don’t use “admin” for your CMS.
- Monitor Your Website:
- Uptime Monitoring: Services like Uptime Robot notify you immediately if your site goes down.
- Security Monitoring: Tools that track file changes and alert you to suspicious activity.
- Google Search Console: Monitors for security issues and malware on your site.
- Educate Yourself: Stay informed about common web vulnerabilities and security best practices.
- Use a Staging Environment: Before making major changes to your live site (updates, new features), test them on a staging (duplicate) site first. This prevents breaking your live site.
- Choose Reliable Plugins/Themes: Stick to well-reviewed, actively maintained plugins and themes from trusted sources. Outdated or poorly coded ones are common entry points for hackers.
The Role of Your Web Host in Disaster Recovery
While you are ultimately responsible for your website’s data, your web host plays a significant role in providing the infrastructure and sometimes, the tools for disaster recovery.
- Server-Level Backups: Many hosts perform daily or weekly server-wide backups. These are great as a last resort, but they might not be as granular or as easily accessible as your own backups. They also operate within the same system, meaning a catastrophic host-wide failure could affect these too.
- Redundancy: Good hosts implement hardware redundancy (RAID arrays, multiple power supplies) to prevent single points of failure.
- Uptime Guarantees: While not directly disaster recovery, high uptime guarantees reflect a host’s commitment to stable operations and quick resolution of issues.
- Support Team: A knowledgeable support team can be invaluable during a crisis, helping you diagnose problems, access backups, or even perform restorations on your behalf.
- Security Infrastructure: Firewalls, DDoS protection, and regular server patching are all part of your host’s responsibility in preventing disasters.
Always clarify with your web host their exact backup policy, how to access their backups, and what their recovery process entails. Don’t assume their backups alone are sufficient for your specific needs.
Conclusion: Don’t Wait for Disaster to Strike
Disaster recovery isn’t a luxury; it’s an absolute necessity in today’s digital landscape. The threat of a site crash or a hack is ever-present, and the consequences can be devastating for your online presence, reputation, and even your bottom line.
By implementing a proactive strategy – focusing on robust, off-site backups, understanding the restoration process, and embracing continuous preventative security measures – you transform yourself from a passive victim into a prepared, resilient website owner.
Don’t wait for that dreaded error message or defaced homepage to realize the importance of this. Start today. Review your backup strategy, test your recovery plan, and harden your site’s security. Your future self, and your website, will thank you for it. Being prepared means that when (not if) a disaster strikes, you’ll be able to confidently say, “I’ve got this,” and get your site back online with minimal disruption.