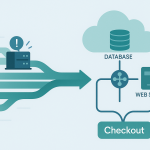
If you run an online store, your website is not just a digital brochure—it is your cash register, your storefront, and your primary source of income. The idea of moving it to a new host often brings on a cold sweat. Downtime. That one word translates directly to lost sales, frustrated customers, and a damaged reputation.
But what if I told you that migrating your high-traffic, revenue-generating e-commerce store to a faster, more secure host could be done without a single moment of visible downtime? Not a five-minute maintenance break. Not a thirty-second lag. Zero. Downtime.
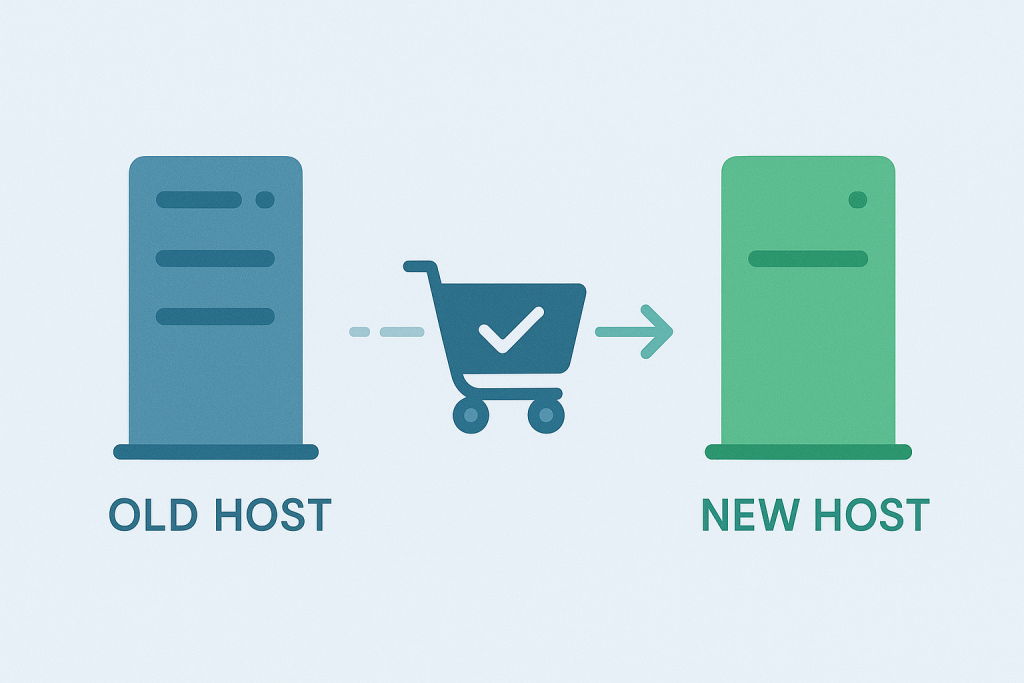
This isn’t just a pipe dream for tech giants; it’s an achievable goal for any serious online business with a methodical plan. As a hosting expert, I’ve seen migrations go smoothly (and seen others go terribly wrong). The secret is a technique called parallel operation—running the old and new sites side-by-side until the perfect moment for the switch.
This detailed, human-friendly guide will walk you through the entire process, from pre-planning and setup to the final, seamless switch, ensuring your customers keep checking out while you make the move.
Part 1: The Zero-Downtime Mindset and Planning
The goal of zero downtime completely changes the strategy. You are not replacing the old site; you are cloning the old site and letting the clone catch up before you change the address.
1. The Critical “Why” and “What” Assessment
Before you even look at your files, you need a crystal-clear understanding of the project.
- Define Your Goal: Why are you moving?
- Bad Reason: “The old host is too expensive.” (Focusing only on cost is a pitfall.)
- Good Reason: “The old host has poor scalability, and my site crashes during holiday sales. The new host offers auto-scaling and managed security, which is critical for my growth.”
- Audit Everything (The Master List): Create a detailed checklist of every component you rely on. Do not trust your memory.
- Core Files & Database: Your e-commerce platform (WooCommerce, Shopify, Magento, etc.), themes, plugins/modules, core database (products, customers, orders).
- Server Configuration: PHP version, memory limits, custom settings, Cron jobs (automated tasks like stock updates).
- Security Assets: SSL Certificates (ensure you can transfer the private key or generate a new one), firewall rules, CDN configuration.
- External Integrations: Payment Gateways (Stripe, PayPal, etc.), Shipping Providers (UPS, FedEx APIs), Email Marketing (Mailchimp, Klaviyo), ERP/Accounting software.
- The Unknowns: Every piece of custom code or a single line of a configuration file you might forget.
2. Choose Your Moment: Low-Traffic Window
While the goal is zero downtime, the final switch (the “cutover”) is the highest-risk moment. If an issue occurs, you want it to happen when the fewest possible customers are affected.
- Identify Your Slowest Time: Use your analytics (Google Analytics, etc.) to pinpoint your absolute lowest traffic and lowest sales hour (e.g., 2:00 AM on a Tuesday). This is your migration window.
- Allocate Buffer Time: Never schedule the final switch for exactly one hour. Block out a generous 4-6 hour window in your calendar for the switch, testing, and potential rollback.
3. The Most Important Pre-Migration Step: Lower the TTL
This single, technical step is the secret sauce for speed.
- What is TTL? TTL stands for Time To Live. It’s a setting on your Domain Name System (DNS) records that tells the world’s internet servers (and your customers’ computers) how long they should remember your website’s IP address before checking for an update.
- The Problem: Default TTL is often 24-48 hours. If you switch your site’s IP, a customer could still be directed to the old host for another two days!
- The Solution:24 to 48 hours BEFORE your scheduled migration window, log into your domain registrar or DNS management tool and set the A-record TTL for your main domain to the lowest possible value, usually 300 seconds (5 minutes) or even 60 seconds (1 minute).
- Why? This forces internet servers to check for the new IP address much more frequently, meaning when you do the final switch, the change propagates almost instantly.
- Note: You must remember to change the TTL back to a higher, more efficient value (like 3600 or 86400) after the migration is 100% complete and stable.
Part 2: Setting Up the Parallel Environment (The Staging Ground)
The “zero downtime” strategy requires you to build, test, and warm up the new server before any traffic goes to it.
4. Provision and Configure the New Host
Your new host is a blank canvas. Recreate your current environment perfectly.
- New Server Setup: Install the exact same e-commerce platform version, PHP version, database software (MySQL/MariaDB), and server software (Apache/Nginx) as your old host. Compatibility is non-negotiable.
- Install Necessary Utilities: Set up any performance tools, like Varnish, Redis, or Memcached, and ensure your SSL certificate is installed and working on the new server’s IP address.
- Security and Firewalls: Configure all security software and firewall rules (like blocking unwanted IP addresses) to match the current live site.
5. Clone Your Site (Files and Initial Database)
Now, you create the mirror image.
- File Transfer: Use FTP, SFTP, or your host’s file manager to transfer all website files from the old host to the new host.
- Pro Tip: To save time and avoid missing hidden files, compress the entire site directory into a single
.zipor.tar.gzarchive on the old server, download the single file, upload it to the new server, and uncompress it there.
- Pro Tip: To save time and avoid missing hidden files, compress the entire site directory into a single
- Initial Database Dump: Export your current database (products, customers, order history, etc.) from the old host using tools like phpMyAdmin or the command line.
- Import and Connect: Import this database into the new host’s database. Update your e-commerce platform’s configuration files (e.g.,
wp-config.php,app/etc/local.xml) to point to the new database name, user, and password.
6. Rigorous Testing in Isolation
The new site is a clone, but no one can see it yet. This is your chance to break things without losing sales.
- The
hostsFile Trick: How do you test the new site without changing the live DNS? You modify your local computer’s hosts file. This file lets you manually tell your computer that when you typeyourstore.com, it should go to the new server’s IP address instead of the live one.- Format:
[New Server IP Address] yourstore.com - Result: Only your local machine sees the new site; the rest of the world sees the old, live site.
- Format:
- Test Checklist (Critical E-commerce Flows):
- Add-to-Cart & Checkout: Run a full test order using real payment methods (and immediately void or refund it if possible).
- User Login/Account: Log in as an existing customer. View order history.
- Search Functionality: Ensure site search works properly.
- Form Submissions: Contact forms, newsletter sign-ups.
- External Integrations: Verify that payment, shipping, and email APIs are connected and communicating correctly.
- Performance: Check page load speeds. They should be significantly faster than the old host.
Part 3: The Data Synchronization Strategy
This is the most complex part of a zero-downtime move for an e-commerce store. Because your old site is still live, new orders, new customers, and new inventory updates are constantly happening. You need a plan to sync that new data to the new server right before the switch.
7. Implement a Data Replication Strategy
You need to minimize the window where data could be lost.
- Freeze All Non-Essential Changes: For the week leading up to the migration, halt all non-essential activities on the old site: no new product imports, no major theme updates, no new blog posts.
- The “Delta” Migration: The full site clone was your “Initial Data Dump.” Now you need the “Delta” (the difference). You have two main options:
- Option A: Manual Final Sync (For Lower-Volume Stores)
- Right before the cutover, you will create a second, final database export from the old host.
- You immediately import this final database into the new host.
- This creates a very brief period (the time it takes to export/import) where a new order on the old site could be missed if the user checks out right as the new database is loaded. You will handle this data loss in a final reconciliation step.
- Best For: Stores with maybe 1-5 orders per hour.
- Option B: Database Replication (The True Zero-Downtime Way)
- Use advanced database features (like MySQL Replication, if your hosts support it) or third-party tools (like a Change Data Capture service).
- Set up the old server’s database as the Master and the new server’s database as the Replica.
- All new writes (orders, accounts) happen on the old Master, but they are immediately mirrored to the new Replica in real-time.
- The Switch: At cutover time, you simply tell the new server to break replication and become the new Master. The data is already there, eliminating the manual export/import downtime.
- Best For: High-volume stores (10+ orders per hour) where a single missed order is a catastrophe.
- Option A: Manual Final Sync (For Lower-Volume Stores)
8. Final Rollback Plan (The Emergency Exit)
A zero-downtime plan is worthless without an immediate, working, Rollback Plan.
- Keep the Old Server Live: The old server must remain powered on and fully operational for at least 72 hours after the switch. This is your “Blue” environment (the new is “Green”).
- Defined Failure Criteria: Establish clear rules for when you must hit the panic button (e.g., “If checkout conversion rate drops by 10% in the first 30 minutes, ROLLBACK”).
- The Rollback Procedure: Revert the DNS records back to the old server’s IP. Because you lowered the TTL (Step 3), this rollback will also propagate quickly.
Part 4: The Cutover and Post-Migration Cleanup
This is the final, high-stakes moment where you shift the traffic.
9. The Final DNS Switch
It’s your low-traffic window. The new site is tested, the database is synced (or ready to be replicated), and the rollback plan is prepped.
- Final Data Freeze (If Manual Syncing): If you are using Option A, briefly enable a maintenance mode page on the old server for 30 seconds to halt any new database writes. Export/Import your final database dump.
- The Switch: Log into your domain registrar/DNS manager and change the A Record (and any other relevant records, like CNAMEs for subdomains) to point to the New Host’s IP Address.
- Immediate De-Freeze (If Manual Syncing): As soon as the IP is changed, update the config on the new server to remove the maintenance mode (if you used one).
10. Verification and Monitoring
The new site is live. You are now in the critical 1-hour verification window.
- Clear Caches: Clear the cache on your browser, on the new server (if applicable), and your CDN (if you use one).
- Test Core Flows (Again):
- Login & Order: Place a real order. Confirm the order email is sent, and the order appears in your new host’s admin panel.
- Check Data Integrity: Do the number of products, customers, and orders match the old system?
- Admin Panel: Access the new admin panel and verify all back-end functions work.
- Monitor Analytics: Watch your real-time analytics like a hawk. Look for a sharp, unexpected drop in visitors, an increase in bounce rate, or a complete halt in checkouts/conversions. If you see any of the defined “Failure Criteria,” execute the Rollback Plan immediately.
11. Final Cleanup and Optimization
Once 48-72 hours pass and the new site is rock-solid, you can complete the process.
- Turn Off the Old Host: After a final backup (just in case), you can decommission (cancel or shut down) the old hosting environment.
- Increase TTL: Set your DNS TTL back to a higher, efficient value (e.g., 86400 seconds / 24 hours). This reduces the load on your DNS provider and can slightly speed up resolution times.
- SEO & Speed Polish:
- Check for 301 Redirects: Run a crawl tool (like Screaming Frog) to ensure all old URLs are redirecting correctly (if your URL structure changed).
- Submit New Sitemap: Submit your sitemap to Google Search Console to tell Google about the new server location.
- Performance Tweaks: Leverage your new host’s features: configure server-side caching, image optimization, and full CDN integration for maximum speed benefit.
Summary: The Zero-Downtime Blueprint
| Phase | Core Action | Zero-Downtime Secret |
| P-1: Planning | Audit all files, databases, and integrations. | Schedule cutover during the absolute lowest traffic window. |
| P-2: Preparation | 48 hours before: Set DNS TTL to 5 minutes (300 seconds). | Lowering the TTL ensures a near-instant switch. |
| P-3: Staging | Set up the new server; clone files and database. | Use the hosts file trick to test the new site privately. |
| P-4: Data Sync | Implement database replication or prepare for final delta sync. | The old and new sites are running simultaneously—no downtime. |
| P-5: Cutover | Point the DNS A-Record to the new server IP. | Keep the old server LIVE as an immediate, ready-to-go rollback environment. |
| P-6: Verification | Test core e-commerce functions (Add-to-Cart, Checkout). | Monitor real-time analytics for 48 hours for any conversion drops. |
Migrating your e-commerce store is a major project, but by treating it as a strategic, parallel operation instead of a risky swap, you completely remove the element of downtime. Plan meticulously, test ruthlessly, and execute with precision. Your customers will never know you moved—they’ll just enjoy a faster, better shopping experience.