The Digital Castle: Why Your VPS Needs a Moat, Drawbridge, and Armed Guards
If you run a website, application, or service that has grown beyond the basic shared hosting environment, chances are you’ve stepped up to a Virtual Private Server (VPS). This is a big, exciting step! It gives you immense power, flexibility, and control.
But here’s the often-missed, critical flip side: With great power comes great responsibility.
When you had shared hosting, the hosting company handled almost all the security. Your neighbor might have been loud, but they weren’t your problem. With a VPS, you are the system administrator. You’re not just a tenant in an apartment building anymore; you’ve bought a plot of land and built your own digital house.
The internet is a wild place. It’s full of automated bots constantly scanning for weaknesses. They are not looking for you specifically; they are just looking for any open door.
This article is your ultimate, no-fluff, easy-to-understand guide to locking down your VPS. We’ll cover the three pillars of VPS security:
- The Firewall: Your frontline gatekeeper.
- SSH Hardening: Securing the keyhole to your server’s command center.
- Best Practices: The daily habits that keep the castle protected.
We will use simple English and practical steps, primarily focusing on Linux-based VPS systems (like Ubuntu and CentOS), as they are the most common choice.
Let’s turn your powerful VPS into an unbreachable fortress.
Part 1: The Firewall – Your Digital Bouncer
The firewall is the single most important security measure you can put in place. Think of it as a digital bouncer that stands at the entrance of your server, checking the ID of every incoming and outgoing data packet.
By default, many VPS installations are wide open. The firewall’s job is to block all traffic except for the services you explicitly allow (like web traffic on port 80/443 or SSH on a specific port). This is known as the “deny all, allow exceptions” principle, and it is foundational to good security.
A. Introducing UFW (Uncomplicated Firewall)
While experienced users might dive into iptables, the native Linux firewall tool, for the rest of us, UFW (Uncomplicated Firewall) is the best starting point, especially on Debian/Ubuntu systems. As the name suggests, it makes firewall management incredibly simple.
1. Installation and Basic Setup
If UFW isn’t installed on your Ubuntu/Debian system:
Bash
sudo apt update
sudo apt install ufw
2. The Golden Rule: Allow SSH First!
STOP! Before you enable the firewall, you must ensure you have explicitly allowed your current SSH connection. If you enable the firewall and block SSH, you will lock yourself out of the server and have to use the hosting provider’s console or rescue mode to fix it.
If you are using the default SSH port (Port 22):
Bash
sudo ufw allow ssh
If you are using a custom port (which we highly recommend later in Part 2), for example, Port 2222:
Bash
sudo ufw allow 2222/tcp
3. Defining the Default Policy
This is where the “deny all” principle comes in. We tell UFW to block all incoming traffic by default:
Bash
sudo ufw default deny incoming
sudo ufw default allow outgoing
Explanation:
deny incoming: Blocks all connections trying to reach the server.allow outgoing: Allows your server to initiate connections (e.g., fetching updates, sending emails, or contacting an external database), which is generally safe and necessary.
4. Allowing Necessary Services
Now, allow only the ports your services require. The most common ones are:
| Service | Port | UFW Command |
| HTTP (Website) | 80 | sudo ufw allow http OR sudo ufw allow 80/tcp |
| HTTPS (Secure Website) | 443 | sudo ufw allow https OR sudo ufw allow 443/tcp |
| Email (SMTP, IMAP, POP3) | Varies | sudo ufw allow 25/tcp (SMTP), etc. |
For a standard web server running a site with an SSL certificate, you’ll need at least SSH, HTTP, and HTTPS:
Bash
sudo ufw allow http
sudo ufw allow https
5. Enabling the Firewall
Once you’ve allowed SSH, you can enable the firewall:
Bash
sudo ufw enable
Type ‘y’ and press Enter. The firewall is now active!
6. Checking Status
Always check your work:
Bash
sudo ufw status verbose
You should see a list of the rules you just created, confirming that the default incoming policy is ‘deny’.
B. Alternatives for CentOS/RedHat: Firewalld
If you are using a CentOS or RedHat-based system, the default firewall management tool is Firewalld. It works similarly but uses service names and zones instead of simple port numbers, which can be slightly more complex but offers more granular control.
To open a port permanently with Firewalld:
Bash
sudo firewall-cmd --zone=public --add-service=http --permanent
sudo firewall-cmd --zone=public --add-service=https --permanent
sudo firewall-cmd --zone=public --add-port=2222/tcp --permanent
sudo firewall-cmd --reload
Part 2: SSH Hardening – Locking Down the Master Key
SSH (Secure Shell) is the tool you use to remotely connect to your server. It is the master key to your digital castle. If an attacker gains access via SSH, they own your server. Period.
It’s crucial to make the SSH entrance as robust and secure as possible.
A. Move Away from the Default Port (Port 22)
The single easiest and most effective step to stop 99% of automated SSH brute-force attacks is to change the default SSH port from 22 to a non-standard number (e.g., 2222, 54321, 10001 – anything between 1024 and 65535 that isn’t already used).
Automated bots look for Port 22. By changing it, you become invisible to them.
- Edit the Configuration File:Bash
sudo nano /etc/ssh/sshd_config - Change the Port: Find the line that says
#Port 22(or justPort 22). Uncomment it (remove the#) and change the number:Bash# Before #Port 22 # After Port 2222 - Update the Firewall:
- UFW: Open the new port before restarting SSH, and close the old one:Bash
sudo ufw allow 2222/tcp sudo ufw delete allow 22/tcp # Only if it was previously open
- UFW: Open the new port before restarting SSH, and close the old one:Bash
- Restart the SSH Service:Bash
sudo systemctl restart sshd - Test Immediately: DO NOT CLOSE YOUR OLD SSH SESSION YET! Open a new terminal window and try to connect using the new port (
ssh user@server_ip -p 2222). If the new connection works, you can safely close the old session. If it fails, you can still use the old session to troubleshoot.
B. Disable Root Login
Logging in directly as the root user is a huge security risk. The root user has god-like privileges. If a hacker guesses the root password, they instantly own the server.
Best practice dictates you should:
- Log in as a standard, non-privileged user (e.g.,
admin,webuser). - Use the
sudocommand when elevated privileges are necessary.
To enforce this, edit the sshd_config file again:
- Edit the Configuration File:Bash
sudo nano /etc/ssh/sshd_config - Disable Root Login: Find the line
PermitRootLoginand change its value tono:BashPermitRootLogin no - Restart SSH:Bash
sudo systemctl restart sshd
C. The Gold Standard: SSH Key-Based Authentication
The absolute strongest form of protection is to completely disable password-based logins and rely only on SSH keys.
SSH keys are a pair of cryptographic files: a private key (stored securely on your computer) and a public key (stored on the server). Connecting requires possessing the private key, which is mathematically impossible to guess.
1. Generating Keys (on your local machine)
If you don’t have one, generate an ED25519 key (modern and secure):
Bash
ssh-keygen -t ed25519
Follow the prompts. ALWAYS set a strong passphrase for the private key.
2. Copying the Public Key to the Server
The easiest way to copy the public key (~/.ssh/id_ed25519.pub) to your server is using ssh-copy-id:
Bash
ssh-copy-id -i ~/.ssh/id_ed25519.pub user@server_ip -p 2222
(Remember to use your new custom port).
3. Disabling Password Login (The Final Step)
Once you’ve confirmed that you can log in using your SSH key and passphrase, you can turn off password logins entirely.
- Edit the Configuration File:Bash
sudo nano /etc/ssh/sshd_config - Disable Passwords: Find these lines and set their values:Bash
PasswordAuthentication no ChallengeResponseAuthentication no UsePAM no - Restart SSH:Bash
sudo systemctl restart sshd
Crucial Warning: If you lose your private key or forget the passphrase after this step, you will be locked out of your server and will need to use your hosting provider’s console/rescue mode to regain access! Back up your private key!
Part 3: Best Practices – The Routine Maintenance of a Secure Server
Security is not a one-time setup; it’s an ongoing process. These are the crucial habits and tools you need to maintain a secure VPS.
A. Keep Software Up to Date
The vast majority of successful server attacks happen through known security flaws that have already been patched. The solution is simple: Update your software regularly.
For Ubuntu/Debian:
Bash
sudo apt update
sudo apt upgrade
For CentOS/RedHat:
Bash
sudo yum update
Recommendation: Consider setting up Automatic Security Updates (like unattended-upgrades on Debian/Ubuntu) for critical security patches.
B. Install and Configure Fail2ban
Fail2ban is an incredible, essential tool that automatically watches your server logs for signs of brute-force attacks (e.g., repeated failed login attempts via SSH, FTP, or web applications).
When it detects a threat, it uses your firewall (UFW/Iptables) to automatically and temporarily ban the attacking IP address.
- Installation:Bash
sudo apt install fail2ban - Basic Setup: The default installation is usually robust, but it’s best practice to create a local configuration file so updates don’t overwrite your settings.Bash
sudo cp /etc/fail2ban/jail.conf /etc/fail2ban/jail.local sudo nano /etc/fail2ban/jail.local - Key Settings to Check (in
jail.local):bantime: How long an IP is banned (e.g.,1hfor one hour).maxretry: How many failed attempts before a ban (e.g.,3is common).- Ensure the
[sshd]section is enabled (enabled = true) and configured to use your custom SSH port (if you changed it).
- Restart Service:Bash
sudo systemctl restart fail2ban
Fail2ban will now silently protect your SSH port, removing the nuisance and potential danger of constant login attempts.
C. Audit Running Services and Ports
The less software you have running, the smaller your “attack surface” is. Every piece of software and every open port is a potential vulnerability.
Ask yourself: Do I truly need this service?
Use the following command to see what ports are listening for connections (listening for external traffic):
Bash
sudo netstat -tulpn | grep LISTEN
If you see services you don’t recognize or don’t need (like an old database server, an unnecessary mail agent, or an unused web server), disable or uninstall them immediately.
For example, if you see a service listening on 0.0.0.0:3306 (MySQL/MariaDB) but only your local web application needs to talk to it, you must configure the database to only listen on the 127.0.0.1 (localhost) interface.
D. Use a Strong, Unique Password for the Initial User
Even with SSH keys, you might occasionally need to log in via password (or use the initial sudo command). Never use a weak or dictionary password.
- Use a password generator.
- The password should be long (16+ characters).
- It should include a mix of uppercase, lowercase, numbers, and symbols.
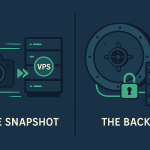
E. Regular Backups are Your Final Line of Defense
No matter how secure your server is, security ultimately is a matter of when a breach or disaster occurs, not if. Humans make mistakes, software has bugs, and hard drives fail.
Backups are the ultimate security measure. They allow you to:
- Recover from Ransomware: If an attacker encrypts your files, you can wipe the server and restore from a clean backup.
- Recover from Data Loss: If you accidentally delete or corrupt a critical database, you can roll back.
- Recover from Bad Patches: If a software update breaks your server, you can revert.
The Golden Backup Rules:
- Rule of Three (3-2-1): Keep 3 copies of your data, on 2 different media types (e.g., local disk and remote cloud), with 1 copy stored offsite (e.g., Amazon S3, DigitalOcean Spaces, Backblaze B2).
- Automate: Use tools like
rsync,duplicity, or your hosting provider’s snapshot system to automate the process. - Test: Periodically practice restoring a backup to ensure the data is actually usable. A failed backup is no backup at all.
Conclusion: Security is a Mindset, Not a Checklist
Securing your VPS is fundamentally about reducing risk. You can never achieve 100% security, but by implementing the steps detailed in this guide—the robust firewall, the locked-down SSH, and the disciplined best practices—you will make your server exponentially harder to crack.
To recap the most critical steps:
- Install and Configure a Firewall (UFW/Firewalld): Deny all incoming traffic by default, and only allow the ports you absolutely need (80, 443, your custom SSH port).
- Change the SSH Port: Stop the automated attacks cold.
- Use SSH Key-Based Authentication: Disable password login completely.
- Install Fail2ban: Automatically punish and ban repeated login failures.
- Keep it Updated: Patch all your software immediately.
Your VPS is a valuable asset. Treat its security with the respect it deserves, and you can focus on building your amazing project, confident that your digital castle is safe and sound.