The Shared Hosting Reality Check: Why Your Speed is a Balancing Act
If you are just starting a website, a blog, or a small online store, you’ve likely landed on Shared Hosting. And for good reason: it’s the most affordable, accessible, and easiest way to get WordPress online.
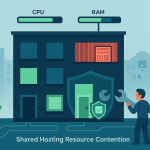
Think of shared hosting like an apartment building. You get your own comfortable unit (your website), but you share the common resources—the plumbing, the electricity, the parking lot—with all your neighbors (the other hundreds of websites on the same server).
When the traffic in the whole building is low, life is great. Your water pressure (website speed) is fantastic. But if one neighbor decides to run a massive, resource-heavy operation—like an industrial laundry business that uses huge amounts of water and electricity—everyone else feels the pinch. Your website suddenly slows down, and you might start seeing frustrating errors.
This is the central challenge of running WordPress on shared hosting: you are sharing limited resources.
However, being on a budget plan does not mean you have to settle for a slow website. By understanding the limitations and applying a set of powerful best practices, you can dramatically improve your WordPress site’s speed, stability, and user experience.
This guide is your deep dive—a complete, actionable playbook to squeeze every drop of performance out of your shared hosting environment, making your site fast, responsive, and ready to grow.
Phase 1: The Foundation — Choosing and Configuring the Right Host
Maximum performance starts not with a plugin, but with the host itself. While you can’t control your “neighbors,” you can control which “apartment building” you choose and what you ask the landlord (your host) to do for you.
1. Choose a Modern, Performance-Focused Host
Not all shared hosts are created equal. You need a host that embraces modern technology, even on their entry-level plans.
- Look for SSD Storage (Solid State Drives): This is non-negotiable. SSDs are significantly faster than old-school HDDs (Hard Disk Drives). They allow your server to find and serve files (like your images and code) almost instantly. This alone can cut your load time by a full second or more.
- Insist on the Latest PHP Version (PHP 8.x): WordPress is built on PHP. Newer versions of PHP are not only more secure but are also exponentially faster. PHP 8.x can execute code up to three times faster than older versions like 5.6 or 7.0. Always use the latest stable version your host supports.
- Server Technology: Look for hosts using LiteSpeed or Nginx over the traditional Apache server for better performance, especially when dealing with static content and caching.
Action Item: Check your host’s control panel (like cPanel) to confirm your PHP version. If it’s old, upgrade it immediately.
2. Leverage Built-in Server Caching (If Available)
Some hosts have server-level caching tools, such as Varnish or LiteSpeed Cache. These are far more efficient than any plugin because they intercept requests before they even hit your WordPress installation, saving precious server resources.
- Host-Specific Plugins: If your host uses LiteSpeed, they will likely offer the LiteSpeed Cache plugin. If they use Varnish, they might recommend a tool like StackCache. Use them! They are optimized for your server environment.
3. Pick the Closest Server Location
Latency is the delay before data transfer begins following an instruction. If your audience is in London, but your server is in Singapore, every visitor will experience a few hundred milliseconds of extra delay.
- Action Item: When you sign up, choose a data center location that is geographically closest to the majority of your target audience.
Phase 2: The WordPress Core — Slimming Down Your Software
This is where most WordPress users shoot themselves in the foot. By keeping your core software lean, you drastically reduce the processing power required for every page load.
4. Use a Lightweight, Fast Theme
The theme is the blueprint of your site. Heavy, bloated themes packed with features, sliders, and page builders you never use are the single biggest performance killer.
- The Best Options: Choose a minimalist, fast-loading theme like GeneratePress, Astra, or Kadence. These are built for speed and load only what is necessary.
- Avoid Over-Packed Themes: Steer clear of “multi-purpose” themes with a dozen built-in sliders, animations, and pre-made templates if you only plan on running a simple blog or portfolio. All that extra code must load, even if you aren’t using the feature.
5. The Plugin Purge: Less is Always More
Every plugin is a piece of extra code your server has to process. In shared hosting, this quickly adds up and consumes your limited CPU and memory.
- Audit Regularly: Go through your list of installed plugins. If you don’t use it, delete it, don’t just deactivate it. Deactivated plugins are harmless, but deleting them keeps your files clean.
- Combine Functions: Replace multiple single-purpose plugins with one well-coded, multi-purpose one (e.g., using a security/firewall plugin that also handles login limits, rather than two separate plugins).
- Plugin Performance Check: If your site suddenly slows down, the last plugin you installed is the prime suspect. You can use tools like Query Monitor (for advanced users) to identify resource-hungry plugins, or simply deactivate them one by one to isolate the culprit.
6. Stay Updated and Use the Latest PHP
This applies to everything: WordPress Core, your Theme, and all your Plugins.
- Security and Speed: Updates not only patch security vulnerabilities but almost always include performance improvements and bug fixes. Running old software is running slow software.
- PHP: We mentioned this in Phase 1, but it’s so important it bears repeating. Always push your PHP version as high as your host allows.
Phase 3: The Caching Power Play — The True Accelerator
Caching is your secret weapon on shared hosting. It’s the mechanism that minimizes the server’s work. Instead of building your entire web page from scratch every single time a visitor asks for it (which involves database queries, running PHP code, and generating HTML), caching serves a pre-made HTML snapshot.
7. Install and Configure a Premier Caching Plugin
A top-tier caching plugin is the single best investment you can make for a shared hosting site. While there are great free options, a paid one can offer unparalleled optimization features that drastically reduce server load.
- Premium Recommendation: WP Rocket is often the easiest and most effective for all-in-one optimization, offering database cleanup, lazy loading, and code minification in addition to stellar caching.
- Top Free Options: WP Super Cache or W3 Total Cache (more complex setup).
8. The Three Key Caching Settings to Master
Within your chosen caching plugin, focus on these powerful settings:
- Page Caching (Mandatory): This is the core function. It saves a static HTML version of your pages. Make sure this is fully enabled.
- Browser Caching (Highly Recommended): This tells a visitor’s web browser (like Chrome or Firefox) to store static files (like your logo, CSS, and JavaScript) on their local computer. The next time they visit your site, the browser doesn’t have to download those files again, resulting in near-instant load times for returning visitors.
- GZIP/Brotli Compression: This compresses your files (HTML, CSS, JS) before sending them to the user, making them smaller and faster to download. Most good caching plugins or hosts enable this automatically.
Phase 4: Media Optimization — Trimming the Fat
Images and videos are almost always the biggest files on any webpage. Unoptimized media will drag your load time into the dirt, regardless of how good your hosting is.
9. Right Size and Compress Every Image
Don’t upload a 4000-pixel wide photo straight from your DSLR camera when the image space on your blog is only 800 pixels wide.
- Resize Before Upload: Use a simple tool (like an online image resizer or Photoshop) to manually set the image dimensions before you upload it to WordPress.
- Use Compression Plugins: Install a plugin like Smush (free/premium) or ShortPixel (premium) to automatically compress images upon upload. This cuts the file size without any noticeable loss in visual quality.
- Embrace Modern Formats: Where possible, convert images to the WebP format. It’s newer, smaller, and faster than JPEG or PNG. Most modern compression plugins can handle this conversion for you.
10. Implement Lazy Loading
Lazy loading is an essential technique where images, videos, and iframes are only loaded when the visitor scrolls down and they become visible in the browser window.
- What it does: It speeds up the initial page load time because the browser isn’t trying to download all the content at once.
- How to Do It: Most quality caching or image optimization plugins (like WP Rocket, Smush, or dedicated lazy load plugins) include this feature with a simple check box. Since WordPress 5.5, native lazy loading is built into the core, but a plugin can offer more robust control.
11. Offload Media and Use a CDN
If you have a large number of images or expect global traffic, a Content Delivery Network (CDN) is an absolute must-have.
- What a CDN Does: A CDN takes your static files (images, CSS, JS) and copies them to servers all over the world. When a visitor comes to your site, the CDN serves them the files from the server (or “Edge Location”) closest to them. This drastically cuts down on latency and, crucially, offloads the work from your shared hosting server.
- Recommendation: Cloudflare offers a robust free tier that is an excellent starting point for any shared hosting user. It’s easy to set up and provides a noticeable speed boost.
Phase 5: Database and Code Cleanliness — The Digital Declutter
Your WordPress database is where all your post content, comments, settings, and revision history live. Over time, it gets cluttered with digital junk that forces your server to work harder to find the data it needs.
12. Clean and Optimize Your Database
This is like giving your file cabinet a deep spring cleaning.
- Limit Post Revisions: WordPress saves a copy of every change you make to a post or page. After a while, these can clutter your database. Limit this to a reasonable number (e.g., three) or disable it entirely by adding a simple line of code to your
wp-config.phpfile:define( 'WP_POST_REVISIONS', 3 ); - Remove Transients and Junk: Use a tool like WP-Optimize or your caching plugin’s built-in database tools to clean up:
- Spam comments and trashed posts.
- Expired Transients (temporary, cached data that is no longer needed).
- Unused database tables left behind by old, deleted plugins.
13. Minify and Combine HTML, CSS, and JavaScript
Minification is the process of removing unnecessary characters (like comments and extra white space) from your code files. Combining files (concatenation) reduces the number of separate requests a browser has to make to the server.
- The Benefit: Smaller files download faster, and fewer requests mean less strain on the server.
- How to Do It: Your top-tier caching plugin (WP Rocket, W3 Total Cache) will have settings for Minification and combining CSS/JS. Enable these features, but test thoroughly afterward, as combining files can sometimes break your site’s design.
14. Fix Render-Blocking Resources
When a browser loads a page, it stops to deal with CSS and JavaScript files before it can display the main content. If these files are “render-blocking,” they delay the visible parts of the page.
- The Fix: Use your caching plugin to “defer” or “delay” the loading of non-critical CSS and JavaScript files until after the main content is already displayed. This dramatically improves the perceived speed of your site (the Largest Contentful Paint Core Web Vital).
Final Thoughts: The Performance Mindset
Running a fast WordPress site on shared hosting is a continuous commitment, not a one-time fix.
Before you spend money on an expensive hosting upgrade, master these core principles:
- Choose a quality host (SSD, modern PHP).
- Keep the software lightweight (fast theme, minimal plugins).
- Cache everything (use a top-tier plugin and a CDN).
- Trim the media fat (resize, compress, lazy load).
- Declutter the backend (optimize the database and minify code).
If, after applying all these steps, your site still struggles, it means you have simply outgrown the shared environment. That’s a huge success! It means your traffic is high enough that it’s time to move up to a specialized Managed WordPress Hosting plan or a Virtual Private Server (VPS).
Until then, these best practices will help you dominate your niche and provide a lightning-fast experience, all while keeping your budget in check. A fast website is a successful website, even on shared hosting.